
Most buyers think a home inspection checklist tells them whether to buy the house. It does not. A good home inspection checklist helps you screen the property, document concerns, and decide what needs a closer look before you waive conditions or close.
What a home inspection checklist is, and what it is not
A home inspection checklist is a visual and practical screening tool you can use at a showing, open house, second visit, or professional inspection. It helps you record what you can actually see: moisture staining, cracks, window failure, unsafe wiring signs, poor grading, and other visible concerns.
No, a do-it-yourself home inspection checklist does not replace a licensed home inspector. A buyer walkthrough may take about 20–60 minutes depending on the property size and access, while a professional inspection commonly runs about 2–4 hours for a house. The checklist prepares you to ask better questions and compare your own notes to the inspector’s report.
No, a checklist does not create legal rights by itself. Your options on repairs, credits, price reductions, or walking away depend on the agreement of purchase and sale, any inspection contingency or condition, the timing, and what the evidence actually shows.
Quick answer: biggest red flags and most common home inspection issues
No, there is rarely one single biggest red flag in every file. I treat active water intrusion, structural movement, unsafe electrical conditions, roof failure, sewer or plumbing defects, fire damage, and evidence of unpermitted work as the issues most likely to change the deal.
The most common inspection issues are usually deferred maintenance, not catastrophic failure. I see repeated concerns around caulking, older windows, drainage, minor cracking, worn roofing components, bathroom leakage, and aging mechanical systems that still function but need budgeting.
The issues that matter most are the ones that are active, expensive, unsafe, or getting worse. A paint scuff is cosmetic. A ceiling stain under a bathroom, a bowing foundation wall, or scorch marks near a panel are different.
No, houses do not universally pass or fail inspection in Ontario. The report identifies condition and risk, and then the buyer decides whether to accept the property as-is, seek repairs, ask for an amendment, get specialist quotes, or rely on a contractual condition if one exists.
How to use this checklist in 7 steps
The best way to use a home inspection checklist template is to follow a fixed sequence and not skip straight to finishes. I tell buyers to think in 7 steps: prepare, start outside, check moisture-prone areas, review major systems, go room by room, document findings, then compare your notes to the professional report.
Start by confirming access and pulling the listing details before you arrive. Bring your checklist, review any seller disclosures if available, and note the property type because a condo unit, townhouse, detached house, and new build all raise different concerns.
Many inspectors begin with the exterior, access points, and major systems, although the exact sequence varies by property and weather. That is why I tell buyers to start with the roofline, grading, siding, windows, foundation exposure, and drainage before they get distracted by paint and furniture.
Move next to the basement, crawlspace, and attic because those areas reveal moisture, settlement, venting, and insulation issues faster than staged rooms do. If access is blocked, note that clearly because inaccessible areas limit what any buyer or inspector can assess.
Review the electrical, plumbing, HVAC, water heater, and visible ventilation after that. Then go room by room through kitchens, bathrooms, bedrooms, ceilings, doors, trim, stairs, and windows to catch leaks, movement, and functional defects.
Document every concern with photos, location notes, and a severity tag before you leave. A simple log with 5 fields works best: issue, location, evidence, severity, and next step.
What to bring: simple tools for a smart walkthrough

Bring basic, non-invasive tools only. A phone or camera, flashlight, charger or power bank, notebook, tape measure, tissues or paper towel, and good shoes are enough for most walk-throughs.
A free home inspection checklist works best if you can use it on your phone and on paper. If you want a home inspection checklist PDF or printable page, the format should have checkboxes plus space for photo references, notes, and severity ratings.
A small level can help you spot obvious slope, and an outlet tester may help with basic observations if used safely, but I would not turn a buyer into a pseudo-tradesperson. The point is to observe and record, not dismantle, diagnose, or prove code compliance.
Label photos by room and system as you go. I tell clients to use names like Basement-north-wall-stain-1 or Kitchen-under-sink-leak-2 because that saves time later when you are matching concerns to the inspector’s report, repair quotes, or lawyer’s review of the deal.
What not to touch or test during a DIY inspection
Do not open electrical panels, remove covers, climb onto roofs, move heavy storage, enter unsafe crawlspaces, light pilot lights, or touch anything that appears unsafe. A Do it-yourself home inspection checklist should stay visual and functional, not invasive.
Do not force stuck windows, doors, locks, shutoff valves, or attic hatches. Breaking something during a showing helps nobody and can create a dispute that had nothing to do with the property condition.
No, buyers should not treat suspected mold, asbestos, lead paint, gas issues, or hidden wiring as DIY problems. Those concerns need the right professional, and the right next step may be specialist testing, a closer review of the agreement, or a decision not to waive conditions yet.
Exterior checklist: roof, grading, drainage, siding, windows, and site
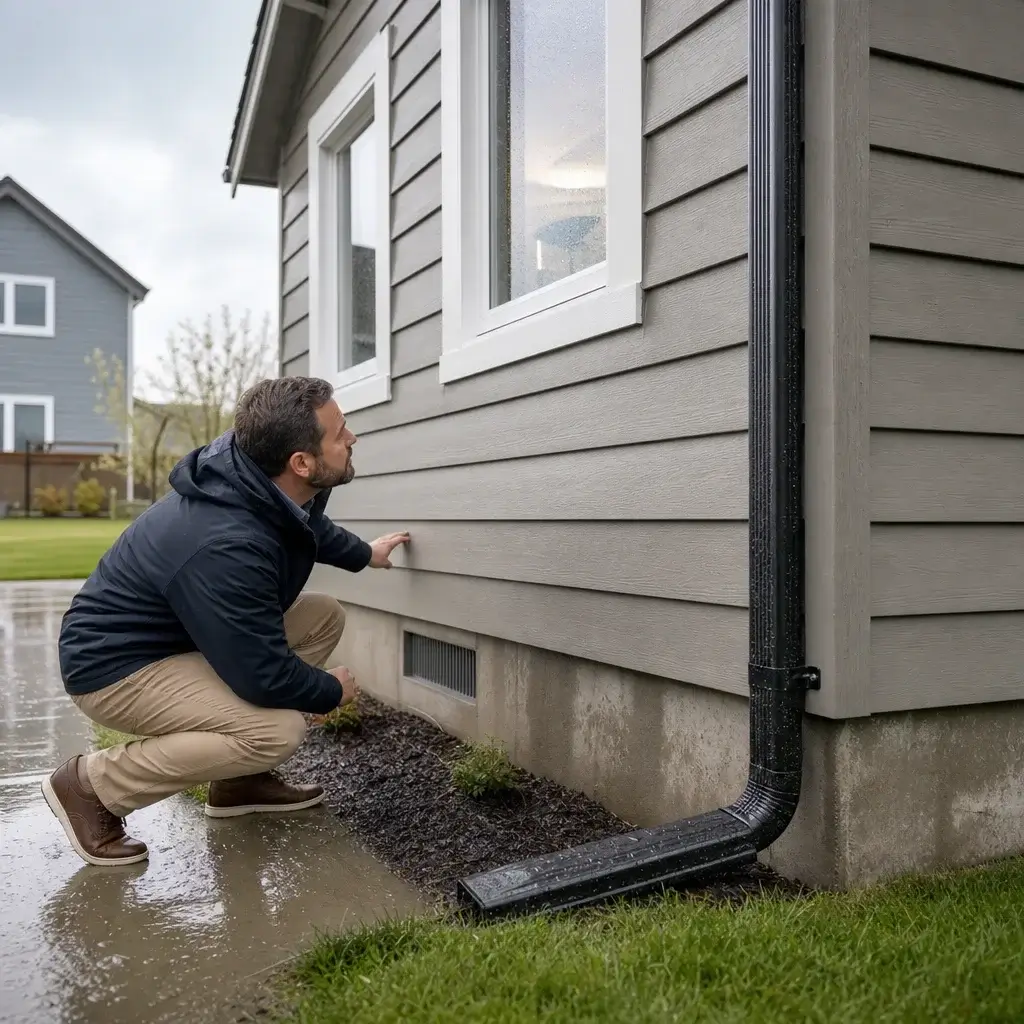
Start outside because water almost always leaves clues there first. Look at the roofline for sagging, missing or damaged shingles, flashing failure, damaged vents, and gutter overflow marks.
Check where downspouts discharge and where the ground slopes. Negative grading, standing water, erosion, or discharge near the foundation can point to recurring basement moisture and freeze-thaw damage, which is a recurring Ontario concern.
Review siding, brick, stucco, trim, and other exterior surfaces for cracks, bulging, soft wood, peeling, failed caulking, staining, and gaps around penetrations. Visible defects on exterior surfaces often explain what you later find inside around ceilings, windows, and baseboards.
Look at windows and exterior doors from the outside for rot, failed seals, open joints, staining, and deteriorated caulking. Condensation between panes usually points to a failed sealed unit, while soft sill material points to water exposure.
Check the yard and landscaping for drainage toward the home, large trees crowding the roof, retaining wall movement, and moisture-prone low spots. A house can look fine from the street and still be collecting water exactly where you do not want it.
Review the driveway, deck, porch, sheds, and garage for settlement, heaving, trip hazards, loose rails, detached ledger concerns, rot, and movement. I have seen buyers ignore a damaged rear deck only to learn later that replacement was not a small repair.
Foundation, basement, crawlspace, and attic checklist
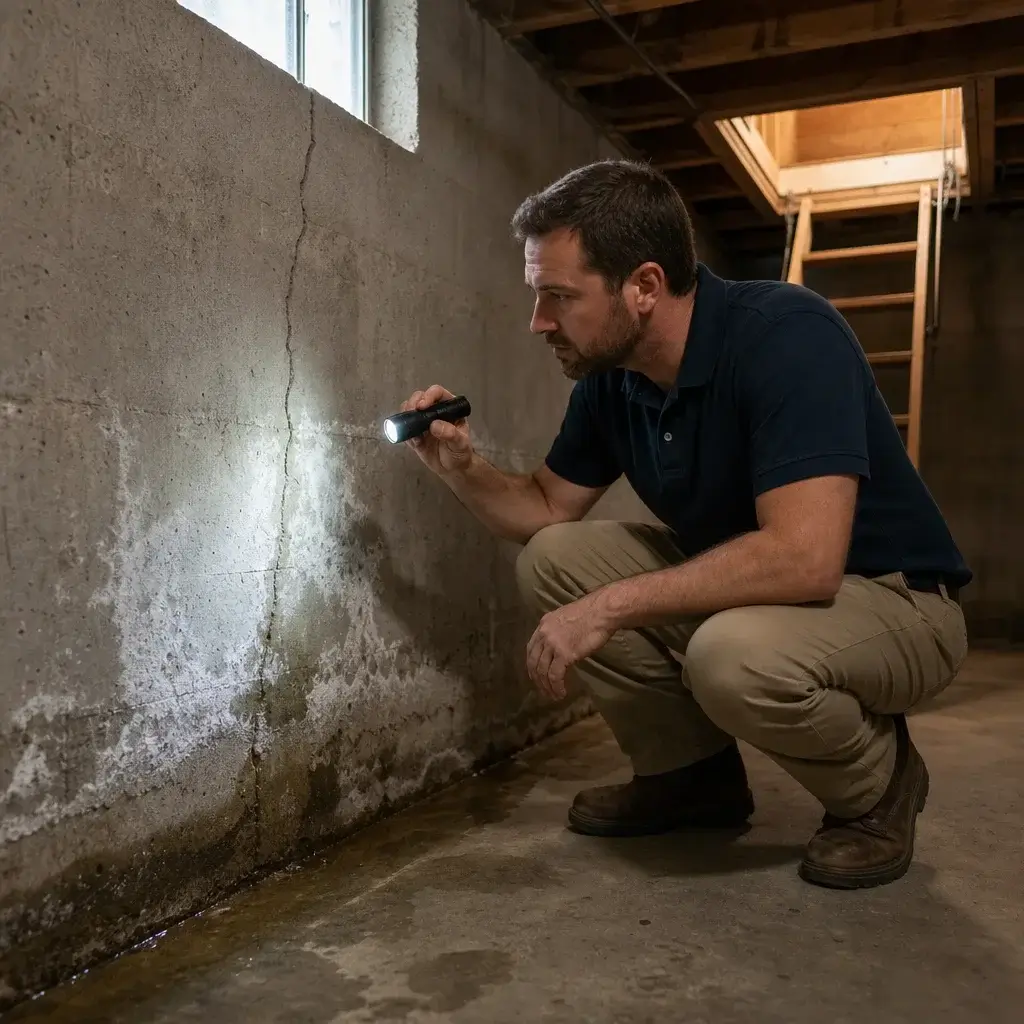
The highest-risk hidden areas in a house are usually the basement, crawlspace, and attic. In Ontario, freeze-thaw cycles and long heating seasons make moisture, condensation, and drainage defects more likely to show up there first.
Check the basement or crawlspace for damp smell, efflorescence, fresh paint over old stains, active seepage, rust marks, sump pump presence, uneven floors, and visible insulation issues. Fresh finishing does not prove a problem, but fresh paint beside old moisture clues should slow you down.
Look at the foundation for horizontal cracking, stair-step cracking, patching, bowing, and visible water entry points. No, not every crack is structural, but cracks with displacement, movement around openings, or signs of repeated water entry deserve a closer review.
Check the attic for even insulation coverage, roof leak stains, mold-like spotting, poor venting, condensation marks, and daylight where it should not be visible. If attic access is blocked or unsafe, note that because the missing access is itself relevant to your risk review.
System-by-system checklist: electrical, plumbing, HVAC, water heater, ventilation
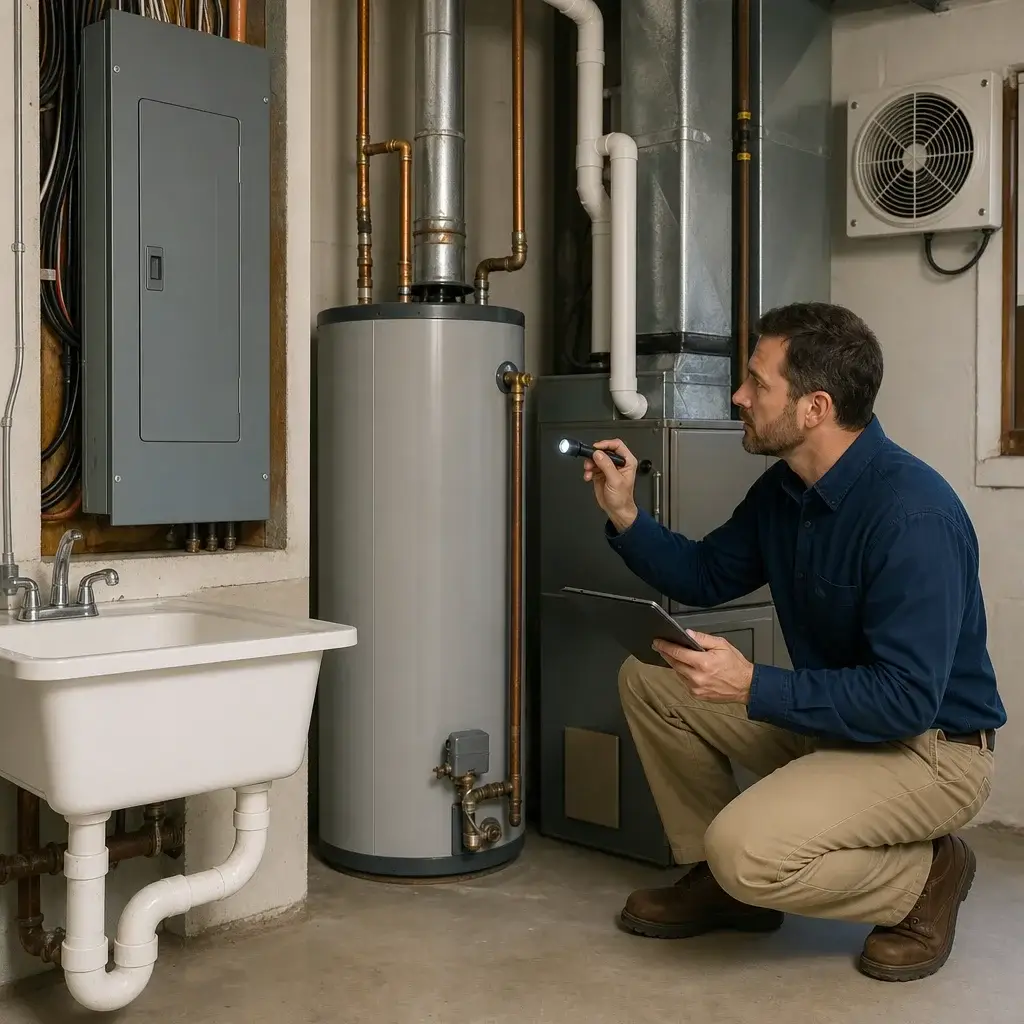
Check major systems for visible safety issues, maintenance neglect, and signs of failure. You are not trying to certify the system. You are trying to spot whether the house needs a specialist or whether the risk is already obvious.
Look at the electrical system for flickering lights, warm or damaged outlets, scorch marks, exposed wiring, heavy extension-cord use, and GFCI protection near water sources where visible. No, you should not open the panel, but visible red flags are enough to justify a professional follow-up.
Check plumbing for slow drains, inconsistent pressure, corrosion, supply or drain leaks, stains under sinks, toilet movement, and visible patchwork repairs. A bathroom that drains slowly and smells musty tells you more than a polished faucet ever will.
Review the HVAC equipment and visible ductwork for rust, unusual noise, dirty filters, blocked vents, missing maintenance labels, and uneven heating or cooling between rooms. I do not give buyers hard age cutoffs without the actual equipment data because condition and service history matter as much as age.
Look at the water heater for pooling, corrosion, venting concerns, and visible age labels if accessible. A leaking tank on inspection day is not a budgeting note. It is an active issue.
Check ventilation in bathrooms, kitchens, and around windows for condensation clues, stale air, and fan operation if allowed. Poor ventilation feeds moisture problems, and moisture problems feed mold, rot, and repeated repair costs.
Room-by-room interior checklist
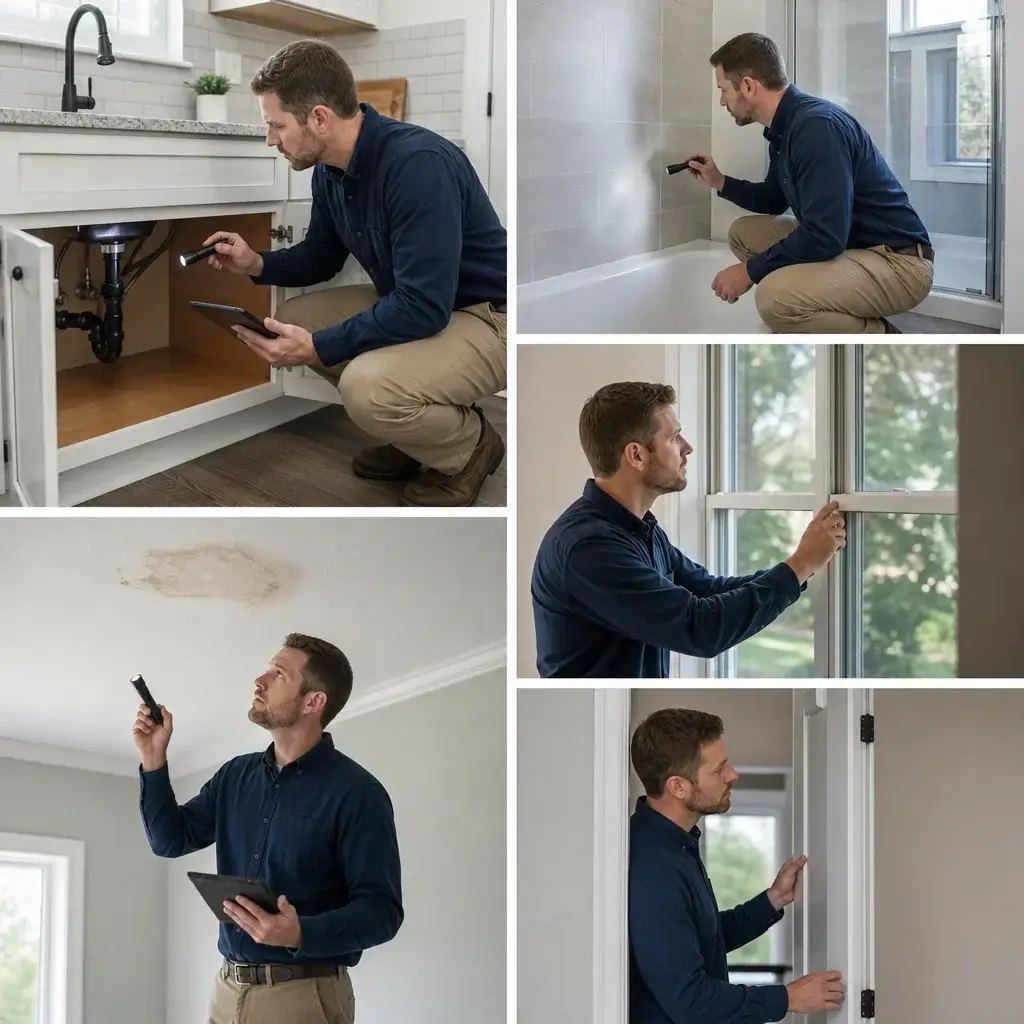
A room-by-room pass works best after you finish the exterior and systems. That order helps you connect a stain or crack inside to the probable source outside or above it.
Check the kitchen for cabinet swelling, leaks under the sink, damaged countertops, weak ventilation, appliance issues if operation is allowed, and visible electrical safety concerns near water. Kitchens hide a lot of slow leaks behind nice finishes.
Check bathrooms for failed caulking, loose tiles, soft flooring, toilet leaks at the base, weak fan performance, staining around tubs and showers, and drainage speed. Bathroom leakage is one of the most common issues I see tied to post-closing complaints.
Check bedrooms and living areas for window operation, floor slope, ceiling stains, wall cracks around openings, enough visible outlets, and musty closets. Bedrooms usually reveal whether the house simply looks updated or was actually maintained.
Check ceilings, walls, and trim for staining, patching, active-looking cracks, soft spots, and repeated repairs around doors and windows. A repainted ceiling can be harmless, or it can be the latest cover over an old leak. The pattern matters.
Check doors and wood trim for rubbing, poor latching, rot, swelling, and uneven gaps. Doors that do not close squarely can point to settlement, humidity, or just a bad install, but they should still go in your notes.
Check windows for opening, closing, locking, drafts, rot, broken hardware, condensation between panes, and interior staining. Failed windows are rarely a walk-away issue on their own, but replacement costs add up fast when the problem is house-wide.
Check stairs and handrails for looseness, movement, and obvious trip hazards. This is a safety review, not a code inspection, and visible instability matters more than cosmetic wear.
Check for smoke and carbon monoxide detectors by presence and apparent placement only. No, a buyer walkthrough is not the place to certify detector compliance, but missing devices or obviously poor placement should still be flagged for follow-up.
Major defect or cosmetic issue? Use a simple severity framework
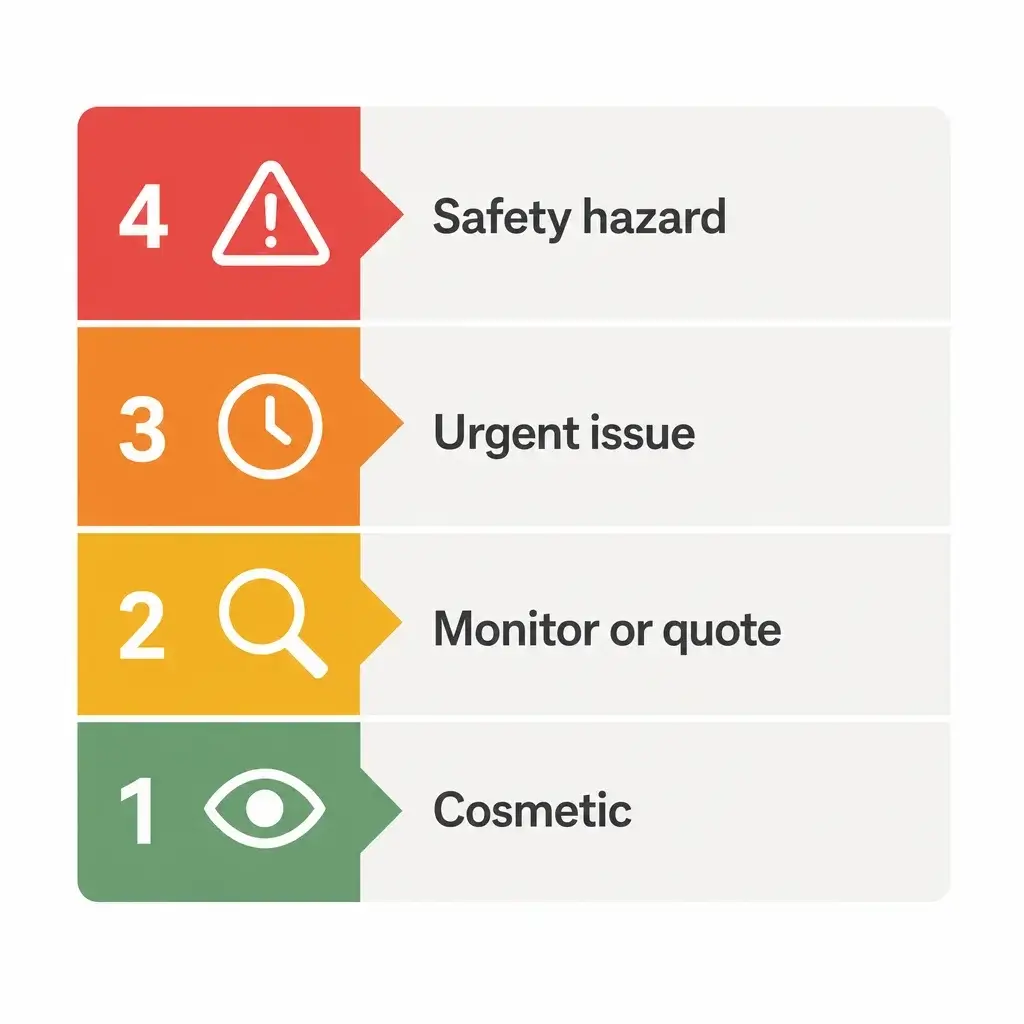
The easiest way to avoid overreacting is to sort findings into 4 levels. I use: safety hazard, urgent system or structural issue, important but monitor or quote, and cosmetic or minor maintenance.
A safety hazard includes exposed wiring, gas concerns, severe stair instability, or signs of fire damage. An urgent system or structural issue includes active water entry, major roof failure, structural movement, sewer backup signs, or a failing foundation wall.
An important but monitor or quote issue includes older windows, moderate grading defects, aging appliances, uneven floors without obvious movement, or localized moisture staining that needs a closer look. Cosmetic or minor maintenance usually means paint, worn trim, small drywall blemishes, old caulking, or a sticky interior door.
Use a table like this in your notes:
| Issue | Location | Severity | Evidence | Next action |
|---|---|---|---|---|
| Ceiling stain | Second-floor bath | 3 | Photo 12, damp edge | Ask inspector to trace source |
| Loose handrail | Basement stairs | 1 | Video 4 | Repair request or quote |
| Window seal failure | Primary bedroom | 4 | Photo 18, condensation between panes | Budget replacement |
The right severity depends on safety risk, active moisture, likelihood of worsening, repair complexity, and whether the issue affects financing, insurance, or occupancy. That is the filter I use when clients ask whether a defect is a nuisance or a real closing risk.
When findings may justify repairs, credits, a price reduction, or walking away
No, inspection findings do not automatically entitle a buyer to money or repairs. The result depends on the agreement, any inspection condition, the evidence, the timeline, and how serious the defect actually is.
Issues most likely to support renegotiation are active leaks, safety hazards, structural movement, roof failure, major plumbing or sewer defects, serious electrical concerns, and environmental issues that need specialist review. Cosmetic wear usually does not justify a big amendment.
In practice, the usual paths are simple. Accept the property as-is, ask for repairs, seek a price adjustment, get specialist quotes, extend the condition period if the seller agrees, or decide not to proceed if your contract gives you that option.
I have seen buyers focus on small trim defects and miss the real issue. One file turned on a freshly painted basement wall hiding recurring seepage. The buyer’s notes and photos mattered because they matched the later inspector’s findings and supported a serious renegotiation before the condition deadline.
If inspection issues raise questions about your purchase agreement, repair amendments, closing risk, or whether to proceed, speak with a real estate lawyer before you waive conditions or close. Timing matters, and late legal advice costs more when the deal is already boxed in.
How to document issues for your inspector, agent, and lawyer
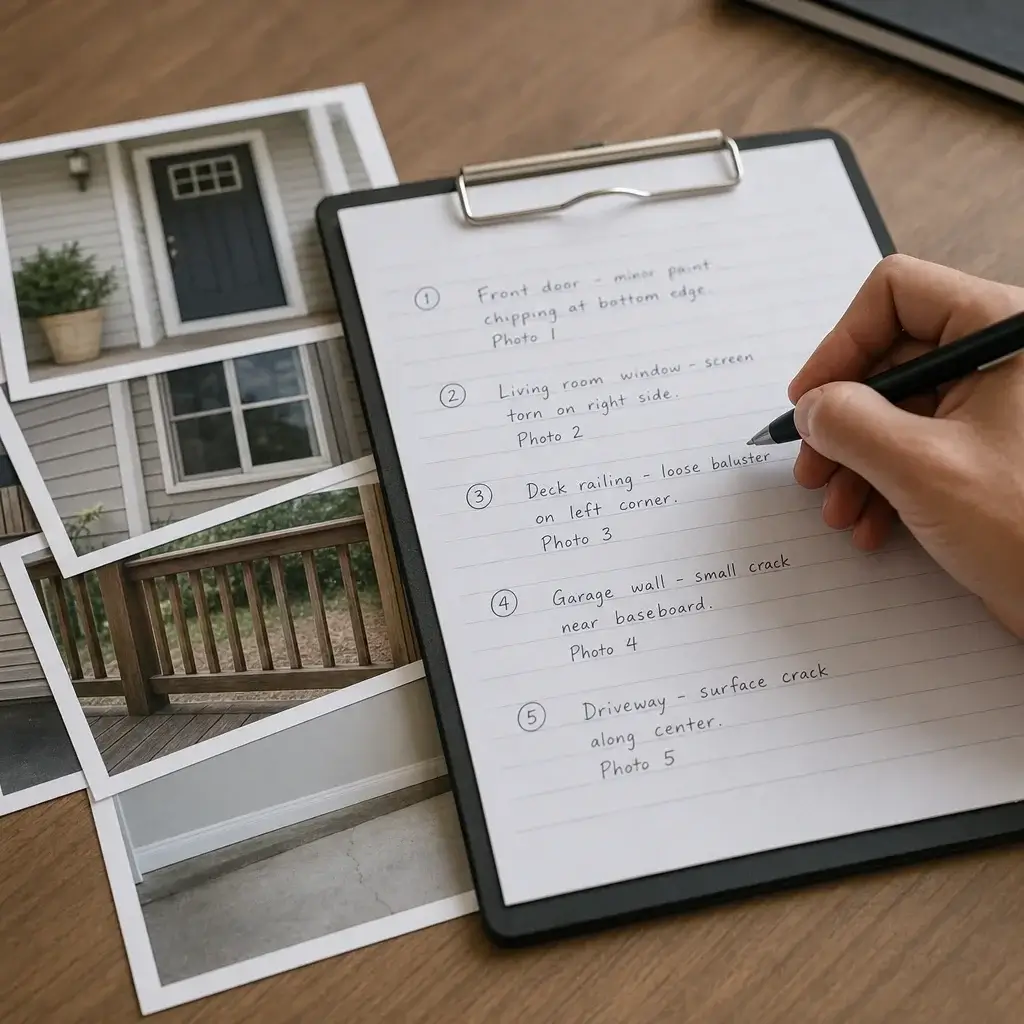
The best documentation is a numbered issue log tied to photos and exact locations. Keep your notes short, factual, and separate from guesses about cause unless a professional confirms it.
A practical log uses 5 fields: issue, location, evidence, severity, and next step. That format works for a home inspection checklist for buyers PDF, a phone note, or a printed worksheet.
Record what you observed, where you saw it, whether it looked active, and why it matters. Water stain on ceiling is better than roof is bad because the first is an observation and the second is a conclusion you may not be qualified to make.
Keep your own notes separate from the inspector’s report and any specialist quote. That separation makes negotiations cleaner and helps your lawyer review the timeline and wording if the findings affect conditions, amendments, or a possible dispute.
Ontario-specific home inspection concerns
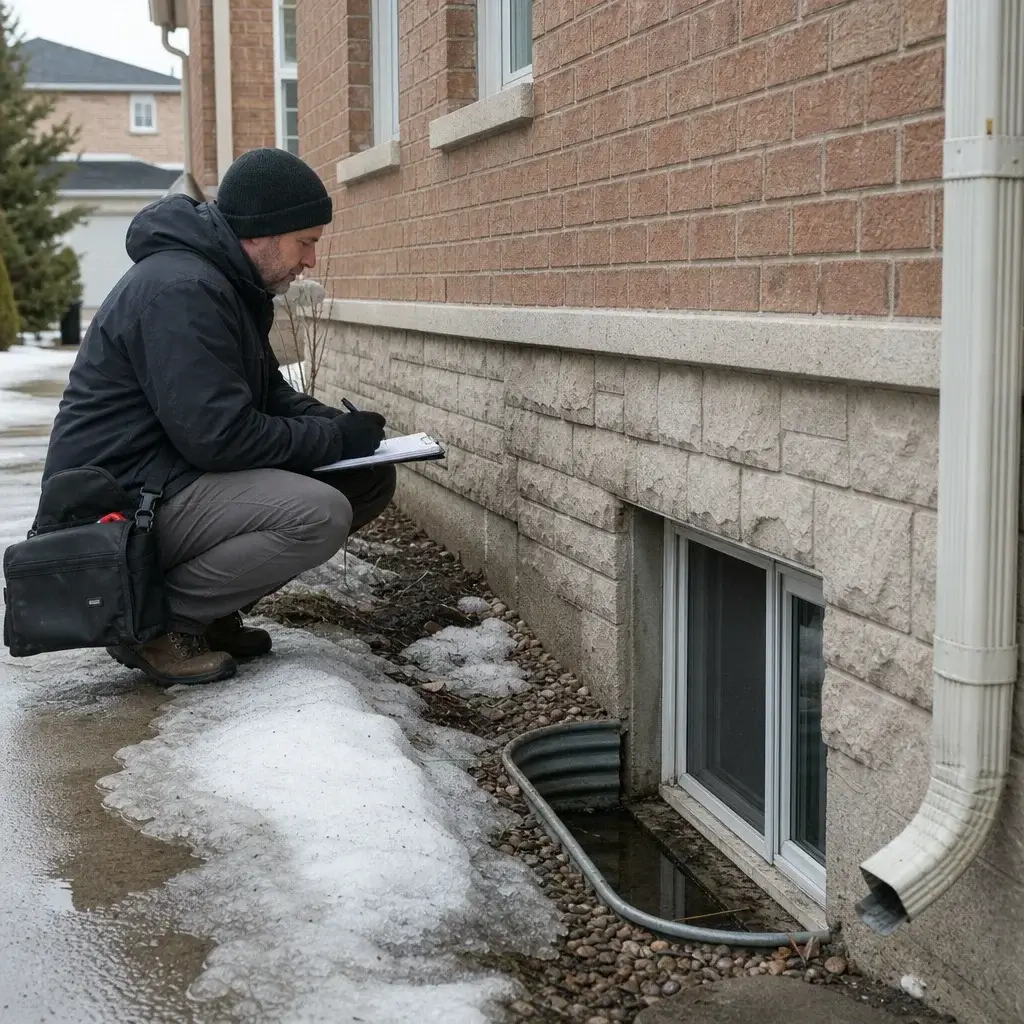
Ontario properties deserve an Ontario checklist. A generic home inspection checklist Canada page often misses freeze-thaw stress, winter condensation, basement dampness, masonry movement, and snow or ice drainage patterns that show up across Toronto and the GTA.
Older Ontario housing stock may raise questions about aluminum wiring, knob-and-tube wiring, aging plumbing materials, lead paint, asbestos-containing materials, and hidden legacy repairs. No, you should not assume any one of these is present just because the home is older, but age and renovation history should change how carefully you inspect.
Moisture is a major local theme. Watch for attic condensation, mold-like staining, basement seepage, clogged exterior drainage paths, and grading that directs meltwater back to the foundation. I have seen small exterior drainage defects lead to large interior repair bills.
Radon, mold, asbestos, and lead concerns may require specialist testing rather than visual screening alone. A home inspection checklist Ontario buyers use should flag those concerns for follow-up, not pretend a quick walkthrough can rule them out.
Checklist differences for condos, townhouses, new builds, and older homes
No, a condo inspection is not the same as a detached-house inspection. In a condo, your visual focus is usually the unit interior, windows and doors, in-suite HVAC if present, appliances, moisture, and any signs that the issue may involve a shared element or common area.
A townhouse needs both interior review and closer attention to roof responsibility, drainage, exterior exposure, and shared-element ambiguity. Buyers often assume a defect is either fully private or fully common. The documents do not always make that answer obvious.
A new build needs a deficiency-focused checklist. Look for incomplete finishes, settlement cracks, missing fixtures, grading concerns, window and door defects, poor caulking, and anything inconsistent with the plans or builder representations. Tarion rules and timelines can matter on those files, so get current advice on your specific purchase.
An older home needs a systems-first checklist. I tell buyers to spend more time on electrical, plumbing, insulation, ventilation, moisture, and signs of past patchwork repairs than on surface finishes. Older houses can be excellent buys, but they punish shallow inspections.
Yes, sellers can use the same checklist before listing. A home inspection checklist for sellers helps catch leaks, detector gaps, grading issues, loose rails, and other defects before they become negotiation leverage for a buyer.
After the walkthrough: next steps before inspection, negotiation, and final walkthrough
After the walkthrough, compare your notes to the listing, disclosures, and later the inspector’s report. Then sort issues into three groups: must investigate now, budget item, and cosmetic.
Get specialist quotes only after the scope is reasonably clear. A plumber, roofer, electrician, structural engineer, or environmental specialist can narrow the real issue faster than three random guesses from a group chat.
Use the proper transaction channel for questions and requests. Buyers should not casually negotiate off a rough note sheet when the issue may need formal wording, timing review, or a condition decision under the agreement.
Bring a short checklist to the final walkthrough. Confirm agreed repairs were completed, included items are still there, no new damage has appeared, and appliances, plumbing fixtures, lights, and doors function at a basic level if access allows.
If a major new issue appears close to closing, act fast. I have seen last-minute water damage, missing chattels, and incomplete repair promises create avoidable closing fights because nobody escalated the problem early enough.
Printable home inspection checklist you can copy into notes or save as PDF
Use this on-page checklist as your Home inspection checklist template. It is built to be phone-friendly, printable, and easy to turn into a Home inspection checklist for buyers PDF if you want to save it offline.
| Item | Pass/Concern | Notes | Photo Ref | Severity |
|---|---|---|---|---|
| Roofline and shingles | ||||
| Gutters and downspouts | ||||
| Grading away from house | ||||
| Foundation cracks or bowing | ||||
| Siding, brick, stucco, trim | ||||
| Windows outside | ||||
| Decks, rails, stairs | ||||
| Driveway and walkways | ||||
| Shed or garage condition | ||||
| Basement moisture signs | ||||
| Crawlspace access and condition | ||||
| Attic insulation and staining | ||||
| Electrical visible concerns | ||||
| Plumbing leaks or slow drains | ||||
| HVAC visible condition | ||||
| Water heater leaks or rust | ||||
| Kitchen sink and cabinets | ||||
| Bathroom caulking and fans | ||||
| Ceilings and wall stains | ||||
| Windows inside | ||||
| Doors and trim | ||||
| Bedrooms and closet odours | ||||
| Stairs and handrails | ||||
| Smoke and CO detectors present |
FAQ
What is the biggest red flag in a home inspection?
The biggest red flags are usually active water intrusion, structural movement, unsafe electrical conditions, major roof failure, sewer problems, and evidence of serious unpermitted work. There is no single universal winner. The issue that changes the deal is the one that is unsafe, expensive, active, or getting worse.
What is the first thing an inspector wants to see?
Many inspectors start with the exterior, access points, and major systems, then move to moisture-prone areas like the basement and attic. The exact order varies by property and conditions.
What are the most common home inspection fails?
The most common findings are usually deferred maintenance items like drainage issues, worn caulking, bathroom leaks, window problems, minor cracking, and older components that need budgeting. These are common findings, not automatic deal-breakers.
Should I hire a professional home inspector even if I do a DIY walkthrough?
Yes. A DIY checklist helps you screen and document, but a professional inspection gives a deeper review of systems, moisture clues, and access-limited areas. Buyers who skip that step should understand the risk they are choosing.
What should I bring to a home inspection?
Bring a phone, flashlight, charger, notebook or checklist, tape measure, tissues or paper towel, and comfortable shoes. Keep the tools simple and non-invasive.
What should I not touch during a DIY home inspection?
Do not open electrical panels, climb roofs, remove covers, move heavy storage, force windows or valves, enter unsafe crawlspaces, or test anything that appears unsafe. Visual observation is enough.
What happens if a home inspection finds major problems?
The home does not legally fail in some universal sense. The buyer usually decides whether to accept the issue, ask for repairs or a price adjustment, get specialist quotes, rely on a condition if one exists, or walk away if the contract permits it.
Can inspection findings lead to a price reduction or repairs in Ontario?
Yes, sometimes. Active leaks, structural issues, roof failure, major system defects, and safety hazards are more likely to support renegotiation than cosmetic defects. The actual leverage depends on the agreement and the timing.
What should I bring to the final walkthrough?
Bring your notes, the agreement, any repair amendment, your phone, and the same checklist you used earlier. Confirm repairs, included items, no new damage, and basic operation of fixtures and appliances if access allows.
Do condo inspections differ from house inspections?
Yes. Condo inspections usually focus on the unit interior and any signs an issue may involve common elements, while house inspections put much more weight on the roof, site drainage, foundation, attic, and full exterior envelope.
A good checklist does not tell you what to feel about a house. It tells you what to verify next, what to budget for, and what to raise before you are legally committed.